The Kapwa Marketing team has been working on the topic of “server-side tracking” for some time now, as the advantages of this tracking method cannot be denied. The most important pros of server-side tagging and server-side tracking include:
- The significant optimization of the website loading time, as no third party JavaScript libraries from Facebook, Google and Co. need to be loaded (anymore),
- complete control over the type and extent of data that is sent to vendors such as Google, Facebook, Pinterest, Tiktok and Co.,
- the associated possibility of complying with the guidelines of the GDPR,
- reducing blocking measures by ad blockers,
- extending the lifespan of cookies,
- the significantly higher security of sensitive information such as API keys, as these are stored in the GTM server container,
- the better way to reduce or completely prevent GA4 spam
- and much more.
These advantages and benefits can be seen as very useful and future-oriented. However, there are also cons that should not go unmentioned:
- The virtual server (cloud server), which is required for the Google Tag Manager server set-up and server-side tracking, is usually subject to a charge. Depending on the number of tracked hits and requests, a larger company can incur several hundred euros a month and a large company several thousand euros per month. We ourselves use the products and solutions from stape.io for server-side tracking. The pricing seems very fair and reasonable to us here.
- Server-side tracking requires a lot of technical know-how for set-up and configuration.
Before we show you how you can set up GA4 server-side tracking via Server GTM (sGTM) and stape.io, we would like to once again explain the differences between client-side tracking and server-side tracking.
Differences between client-side tracking and server-side tracking
With client-side tracking, a Google Tag Manager web container is implemented on your website. A GA4 configuration tag is active in this GTM Web Container, which, due to the standard configuration, can send visitor data of any kind directly to the Google Analytics servers (google-analytics.com/collect). Everything happens in the browser (client-side).
A GTM web container is also active for server-side tracking, but the GA4 data is not sent directly to the Google Analytics servers, but to your virtual server / cloud server (e.g.: ss.yourwebsite.com/collect or gtm.yourwebsite.com/collect), on which the GTM Server Container is hosted.
All GA4 data is processed in your cloud (GA4 client as a basic requirement) and then sent to the Google Analytics servers according to the configuration. This gives you full control over which data is sent from your cloud server to any other server.
Now that we know the basic differences between client-side tracking and server-side tracking, we can devote ourselves to the actual topic of this blog post! 😉
How can I set up GA4 server-side tracking via Server GTM (sGTM) and stape.io?
The first step to setting up GA4 server-side tracking via Server GTM and stape.io is to create a server container in GTM.
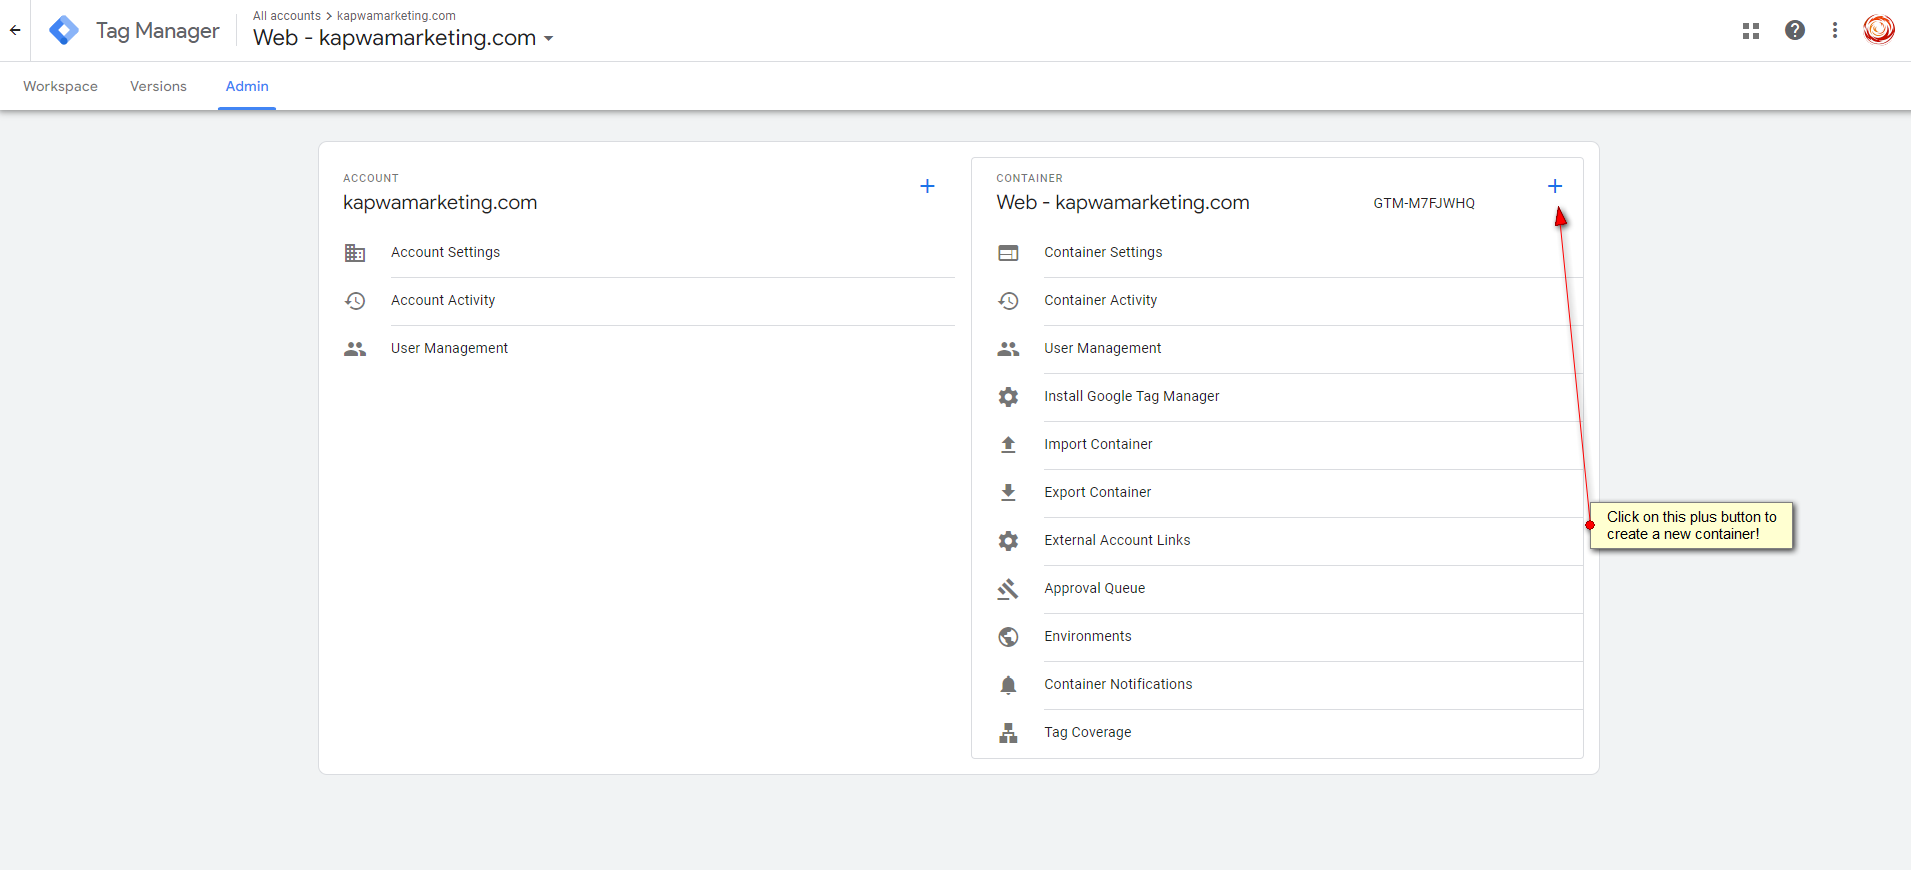
Creation of a GTM Server Container
If you have previously used client-side GA4 tracking via GTM, you will already have a GTM account.
- Go to the Admin level of your GTM account and create a new container.
- Give your container a reasonable container name and select the Server option.
- Now select Manually provision tagging server and get your container config.
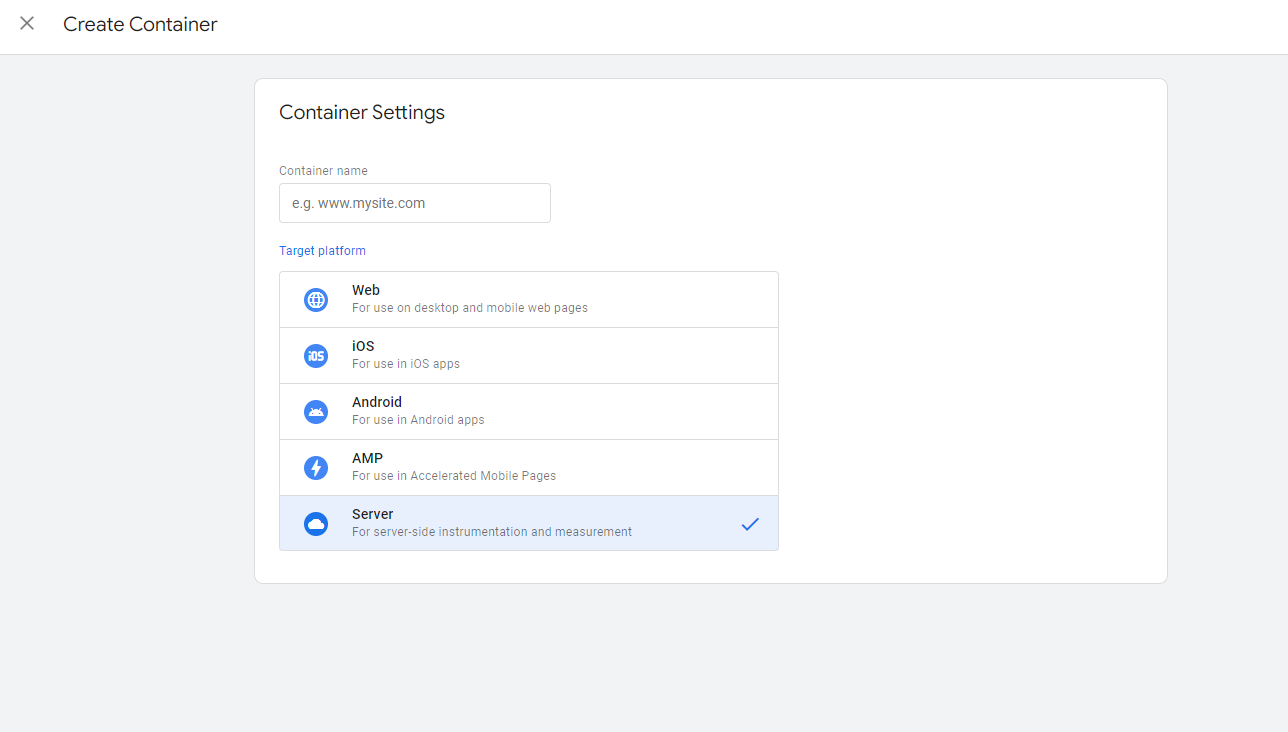

You need the container config for your stape.io account.
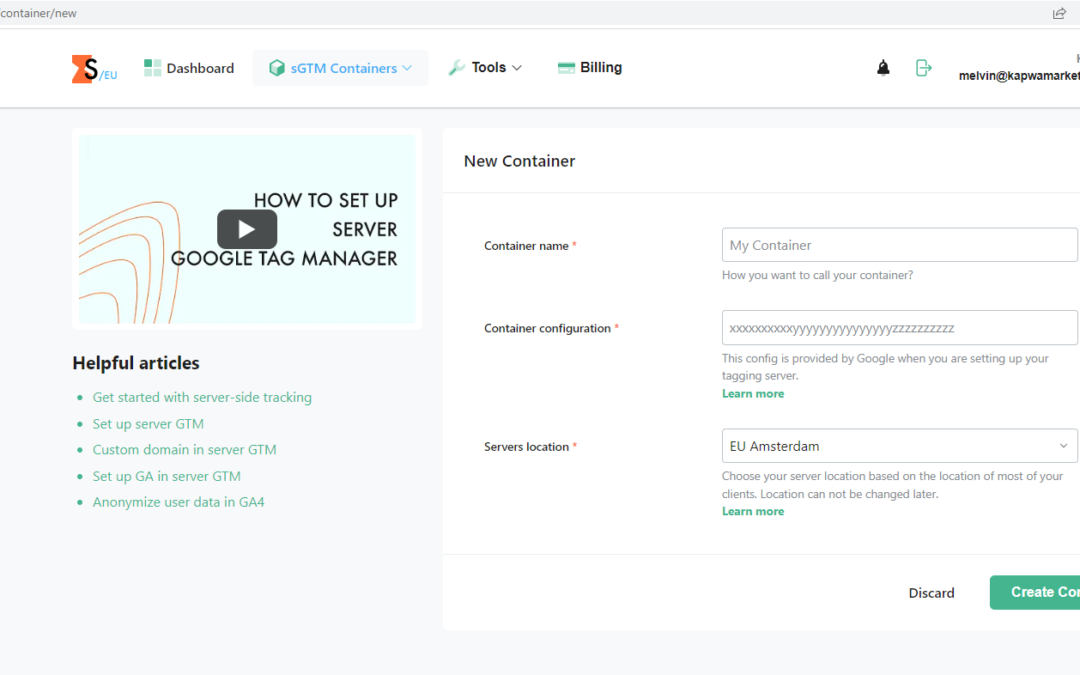
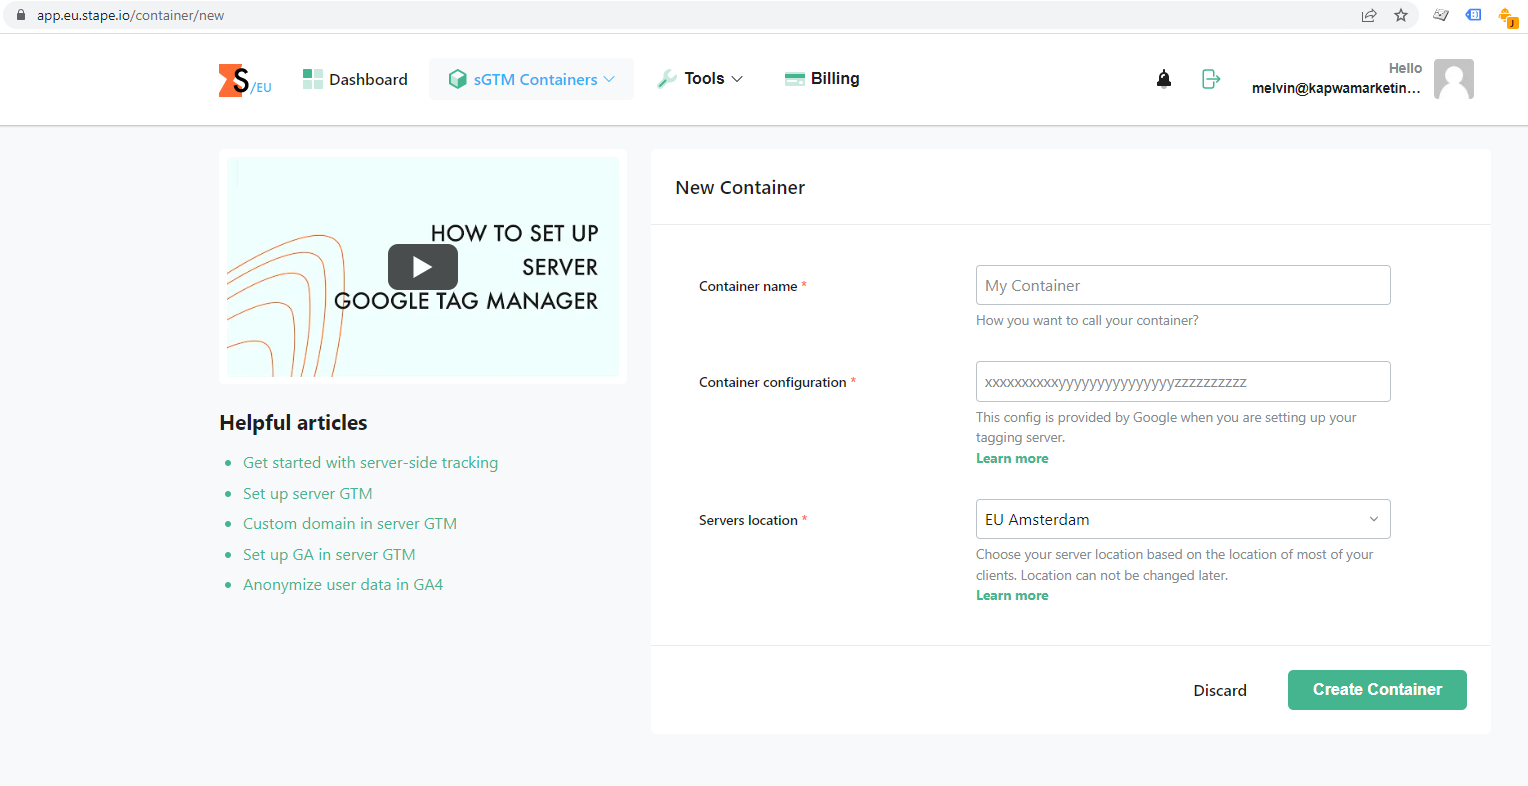
Creation of a new stape.io sGTM container
Now the cloud (service) provider comes into play. In our case, this is stape.io.
- Create an account on stape.io and fill out all the required fields to create a stape.io sGTM container.
- Give your stape.io sGTM container a reasonable container name and then enter the container config from your Google Tag Manager server container in the Container configuration field.
- Select your Servers location. We recommend a location in Central Europe for website operators in Europe.
Determination of the tagging server URL in stape.io
As Tagging Server URL (server container URL) in stape.io you can choose a subdomain of stape.io or your own subdomain (custom subdomain). We recommend using the Custom Subdomain, as this can extend the lifespan of your cookies (first party cookies instead of third party cookies).
We chose https://gtm.kapwamarketing.com for our custom subdomain. This is also the server container URL, which must be stored in the GTM server container settings.
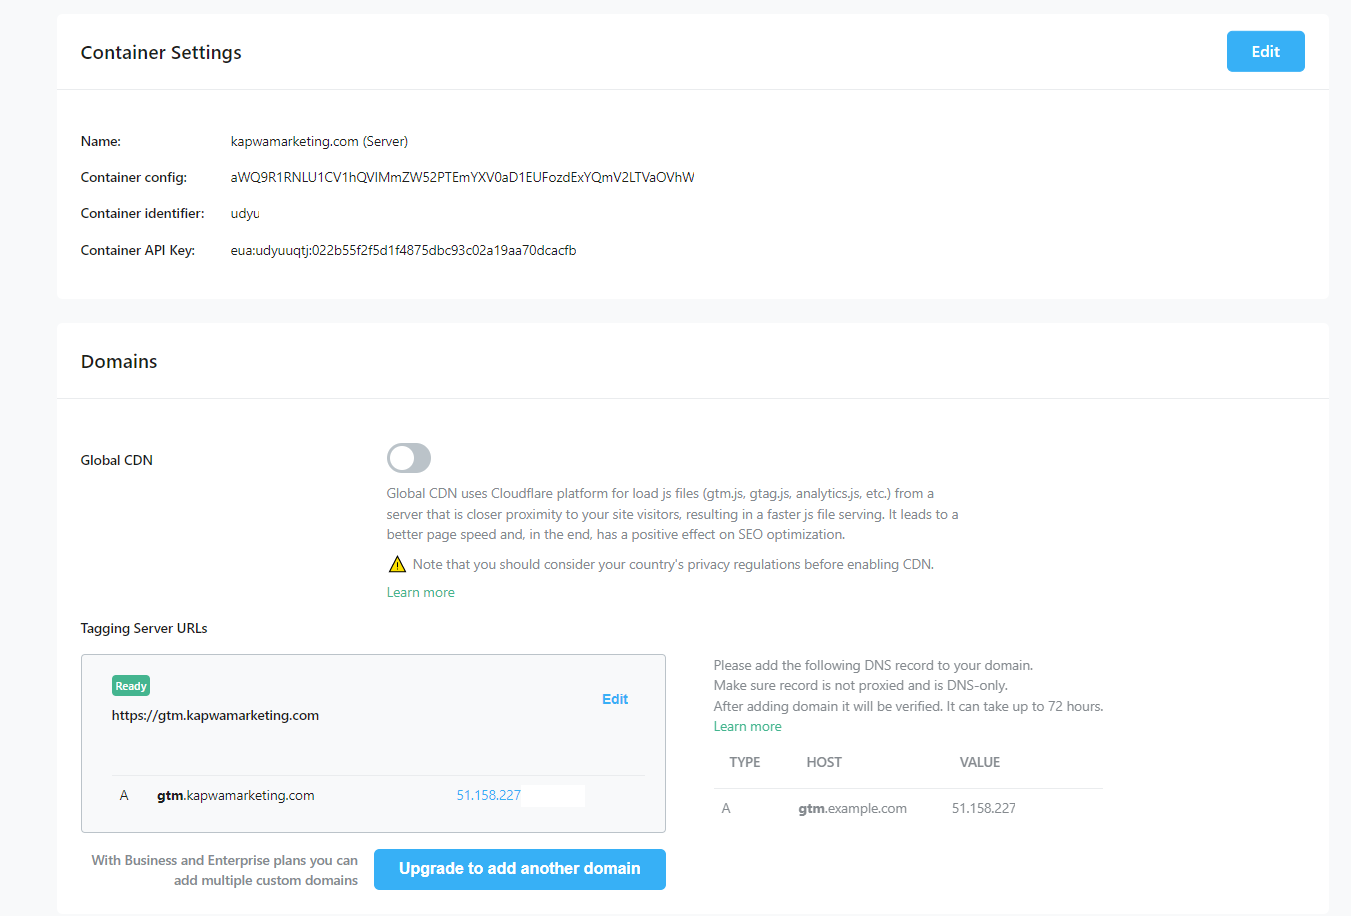
It is important that the DNS record is set to “DNS-only”. If you don’t know exactly or are not sure how to do the step just described, feel free to contact us. We’re happy to help you!
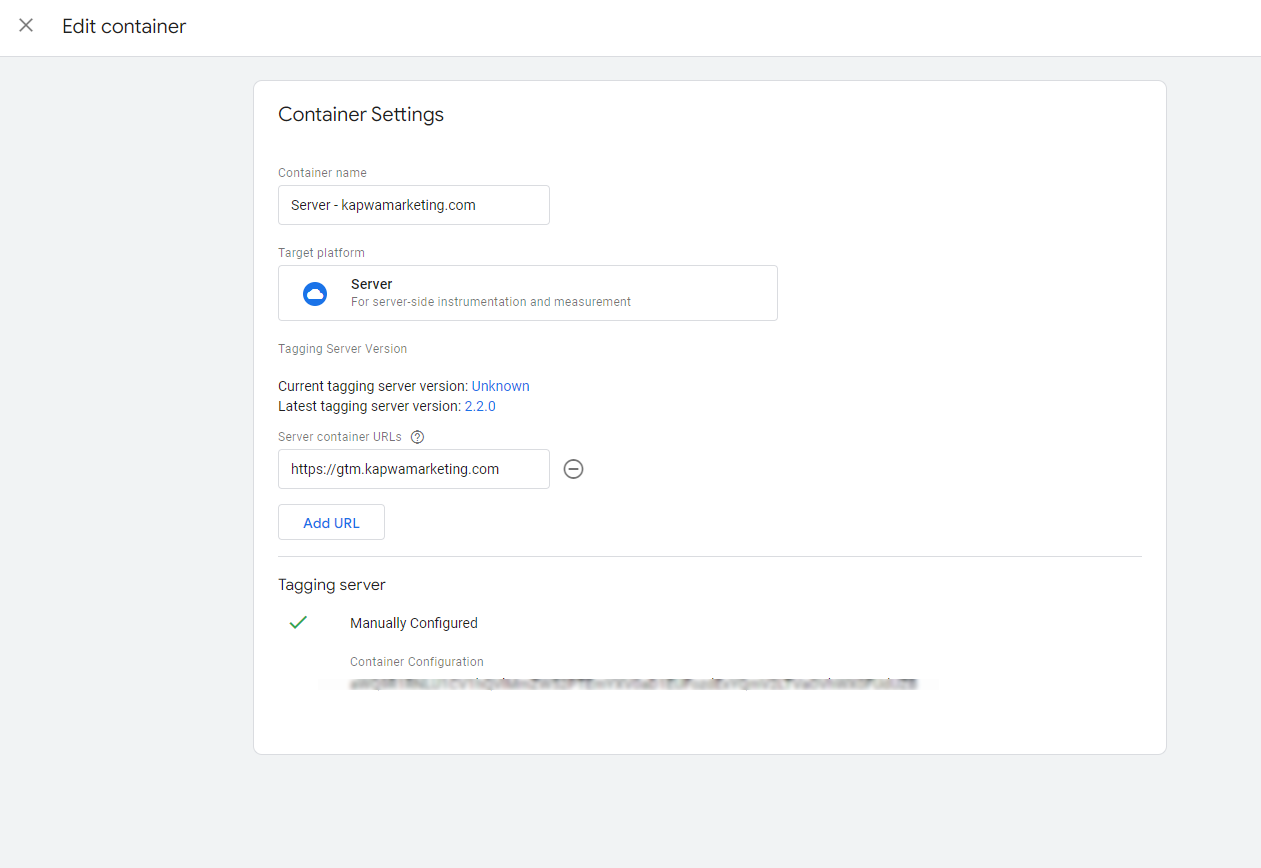
You can enter the new tagging server URL (server container URL) in the GTM administration in the container settings of the GTM server container:
Use of the stape.io Custom loader for the Google Tag Manager Web Container
The next step involves optimizing your GTM scripts (GTM Web Container) using the stape.io Custom loader.
As already mentioned in the paragraph “Differences between client-side tracking and server-side tracking”, a Google Tag Manager Web Container is also required for GA4 server-side tracking. However, the GA4 configuration tag activated in this container no longer sends the GA4 data directly to the Google Analytics servers, but to your cloud server on which your Google Tag Manager server is hosted.
Using the custom loader from stape.io is uncomplicated and ensures higher validity and quality of the data stored on your cloud server.
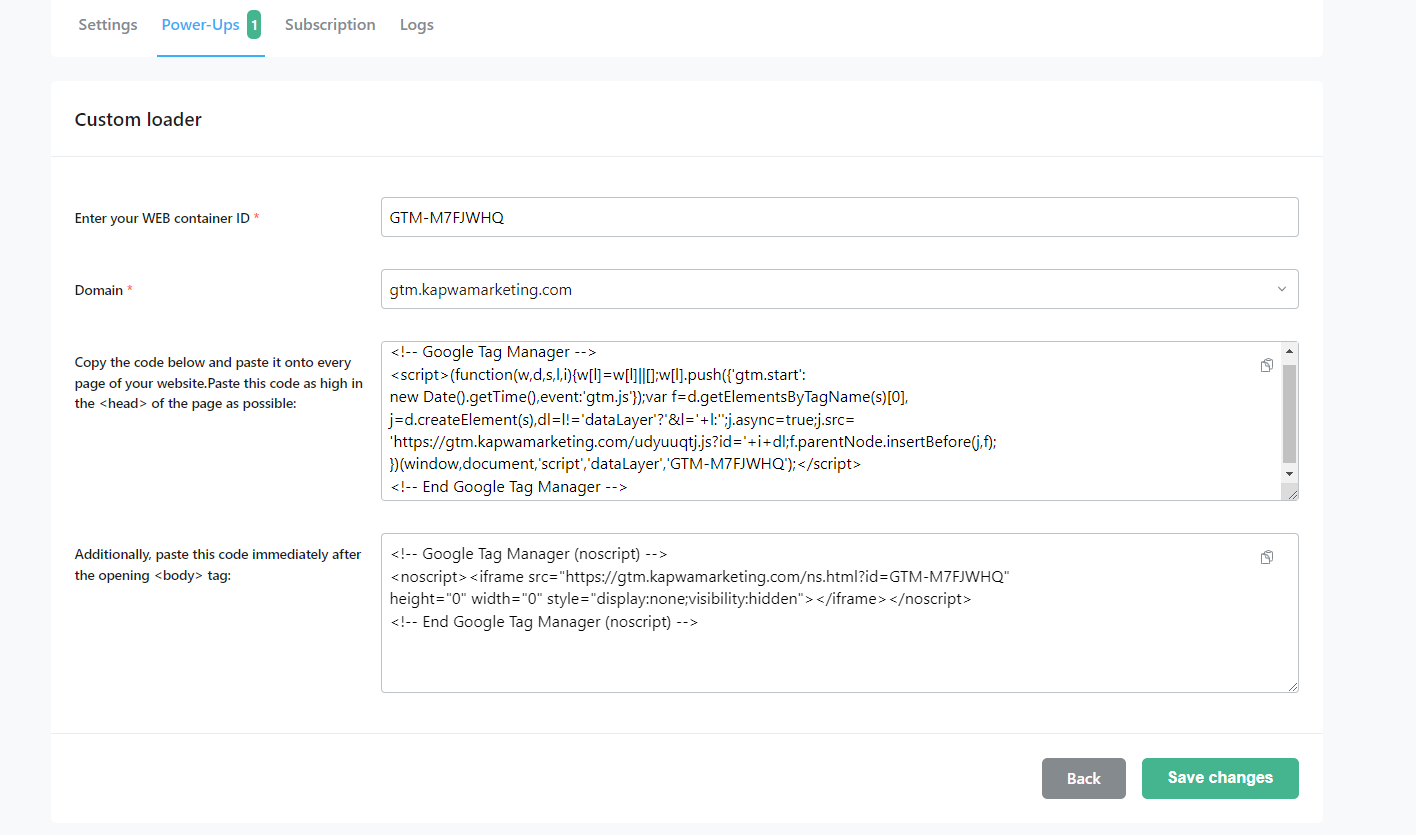
- In your stape.io account, go to the corresponding sGTM container.
- Click on Power-Ups next to Settings.
- Click on the Custom loader field.
- Enter the ID of your Google Tag Manager Web Container as well as your Custom Subdomain / Tagging Server URL (server container URL).
- Implement the new scripts on your website.
Creation of the modified Google Tag in the Google Tag Manager Web Container
Now we need the modified Google Tag in the GTM Web Container, which no longer sends the GA4 data directly to the Google Analytics servers, but to the cloud server on which the GTM Server Container is hosted.
We assume you already have a GTM Web Container and a Google Tag. It is important that you make a few changes here:
- Add the Configuration Parameter send_page_view with Value true.
- Add the Configuration Parameter server_container_url with Value [Your Tagging Server URL] (In our case: https://gtm.kapwamarketing.com).
In our GTM Web Container the modified Google Tag looks like this:

Please select either the “All Pages” trigger or a modified trigger that takes your Consent Management Platform (CMP) into account.
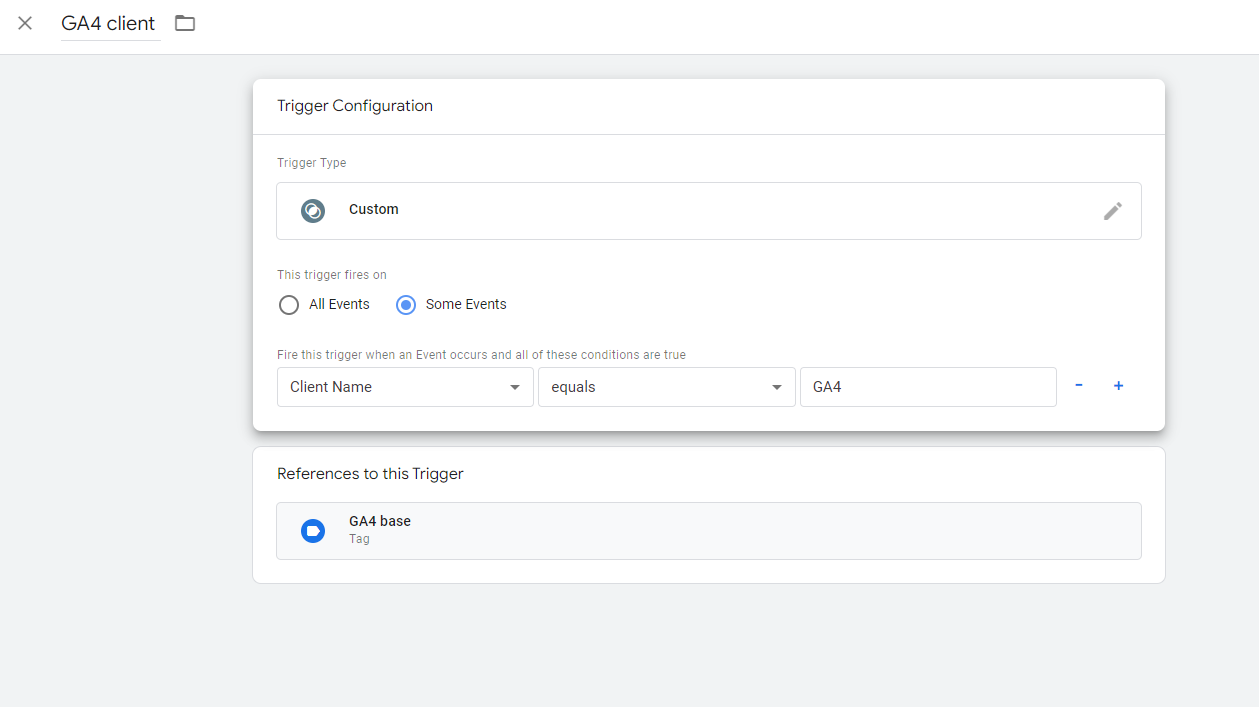
Creation of the “GA4 Client” trigger in the GTM Server Container
Once the Google Tag has been created or modified in the GTM Web Container, we finally go back to the GTM Server Container. Because now the “GA4 Client” trigger needs to be created.
- Create a new trigger (trigger type “Custom”)
- Define: “This trigger fires on some events“.
- For “Fire this trigger when an Event occurs and all of these conditions are true” set: “Client Name equals GA4”.
For GA4 server-side tracking, a so-called client is required that can claim and process the incoming GA4 data. The “GA4 Client” trigger should also be understood in this context.
In your Server GTM Container you will find all clients that are activated by default under “Clients”.
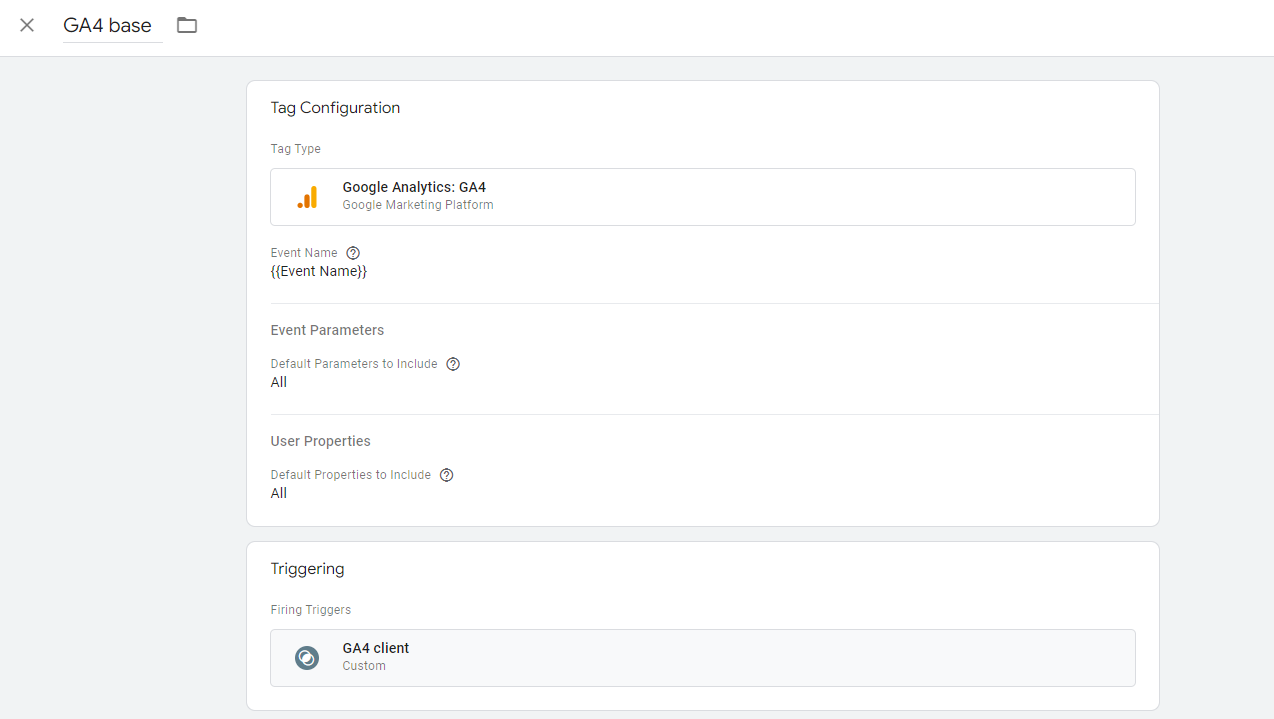
Creation of the GA4 base tag in the Server Google Tag Manager Container
So that all events that are sent from the Web Google Tag Manager Container to the Server Google Tag Manager Container are also sent to the Google Analytics servers, last but not least, the GA4 base tag must be created.</p >
- Create a new tag of the type “Google Analytics: GA4” in the GTM Server container.
- Enter the variable {{Event Name}} in the “Event Name” field.
- Select the “GA4 Client” trigger.
Note: With the tag type “Google Analytics: GA4” you have the option of having the visitor IP address removed. To do this, simply select “true” in the field for “Redact visitor IP address”:
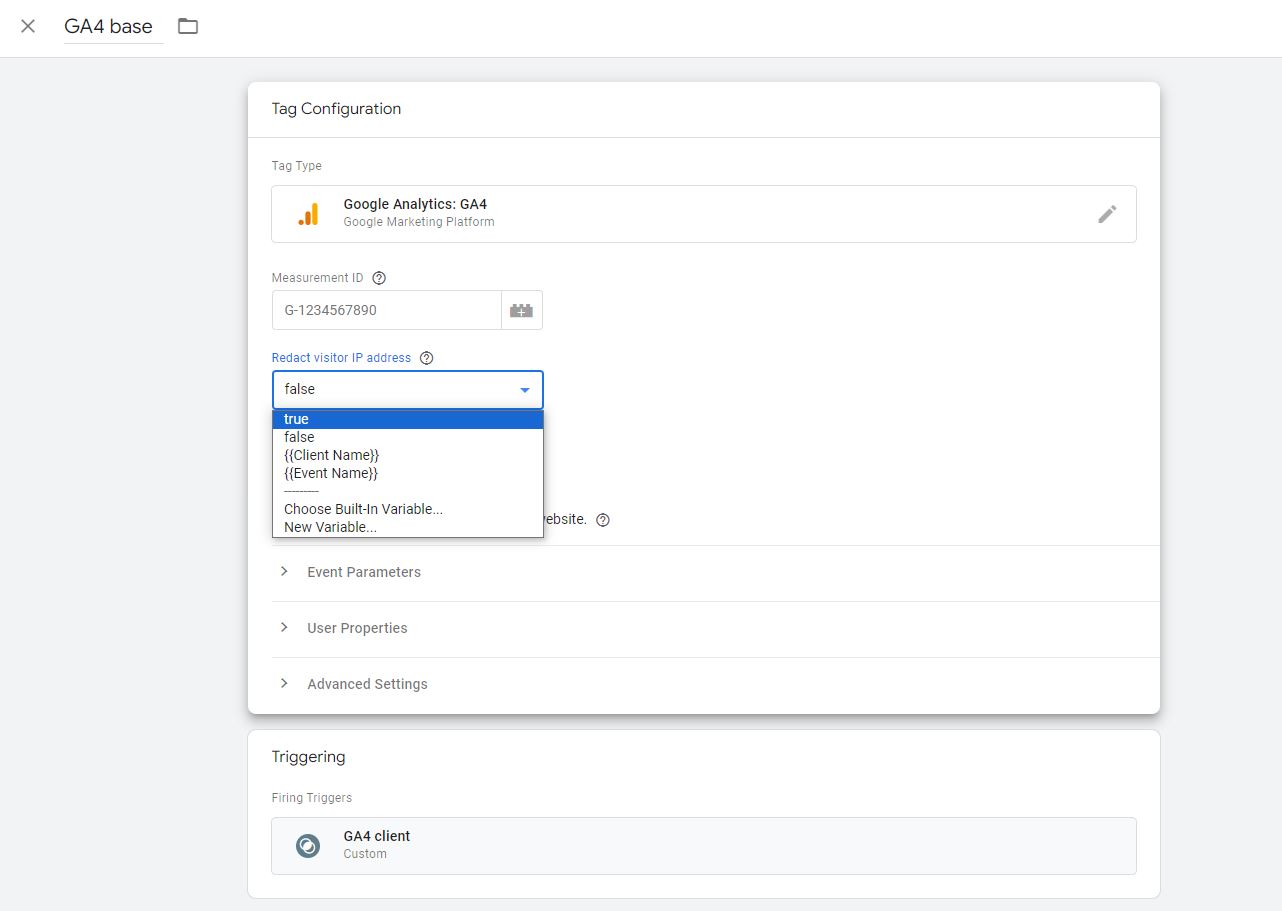
Further note: A Measurement ID does NOT need to be entered. Google provides the explanation itself: “If the event came from a GA4 web tag, you can leave this field blank to inherit the measurement ID of the event.”
Checking the configuration in debug mode of the GTM Server Container
Before you publish your new tags and triggers in the GTM Server container, it is advisable to use the sGTM debug mode. To do this, click on the blue “Preview” link in the GTM workspace. Then open your tagging server URL / custom subdomain in a new tab and add, for example, ?test. In our case: https://gtm.kapwamarketing.com/?test.
In debug mode we have the following (correct) output:
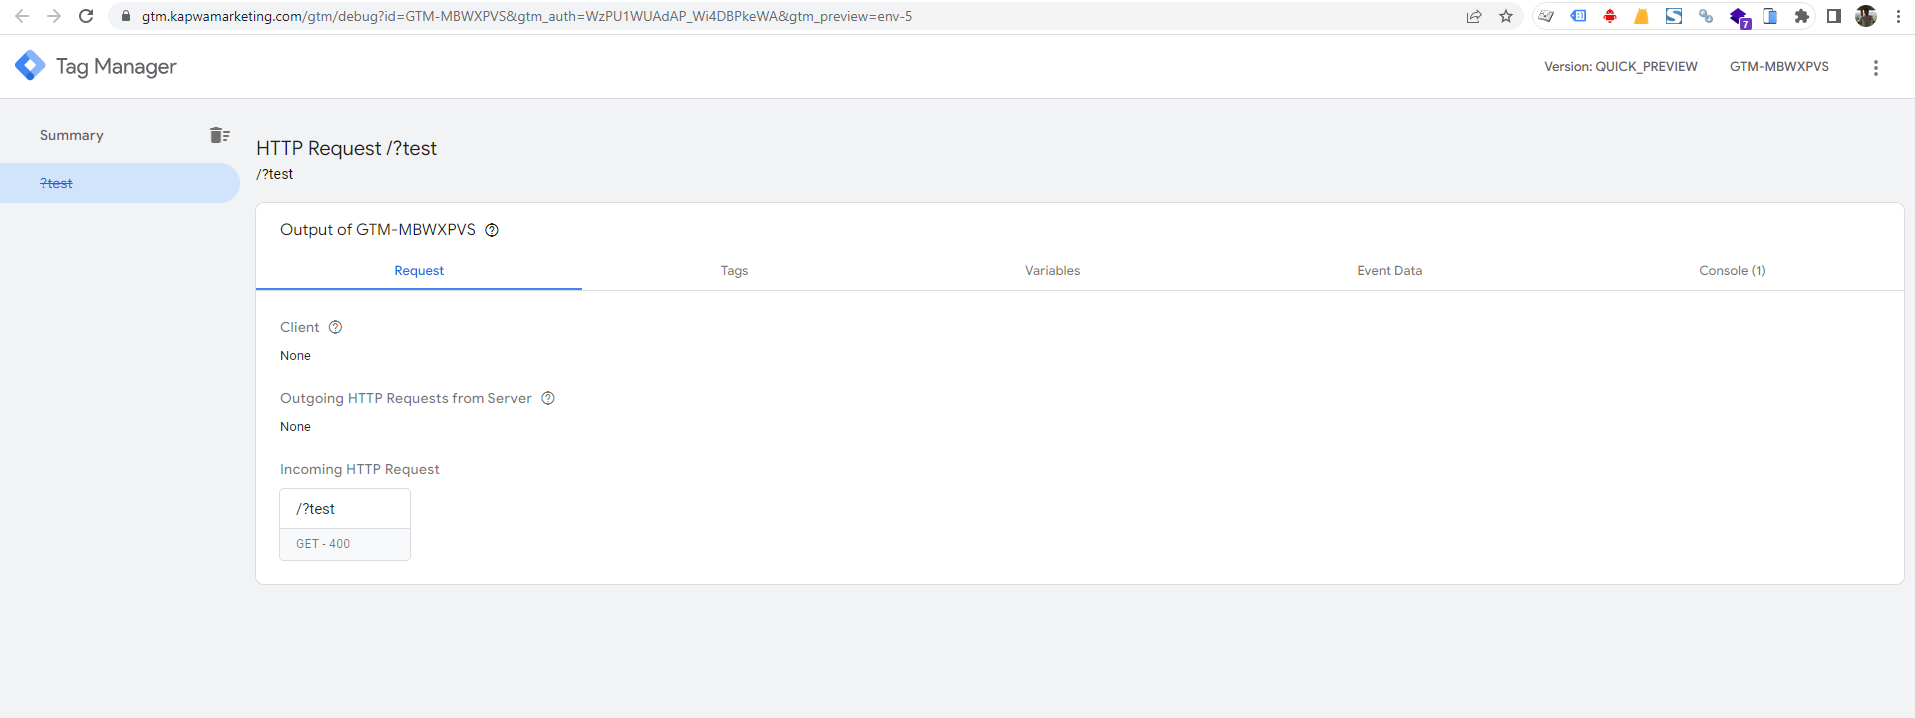
After this review, the new Google Tag Manager Server Container can be published. Yippee!
Of course it makes sense to carry out further tests after publication and check whether all GA4 events actually arrive cleanly and are sent to the Google Analytics servers.
You have questions regarding our how-to article “Server-side tracking: Setting up GA4 server-side tracking via Server GTM (sGTM) and stape.io”? Feel free to get in touch with us!